Cookies Weekend

It was a cookie-baking weekend. It wasn't planned, just happened that the mood and the flow was just there! Well, I guess for cookies, you can still bake and keep it till Chinese New Year (CNY). Therefore, it wasn't considered too early too!
The cookies which I baked, weren't the usual recipes which I normally used. Why? Because I wanted to try new cookies and new recipes. Frankly, if you ask me, I'm not a great fan of cookies, except Subway's soft and chewy cookies. Even so, how many can you eat?

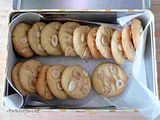
Anyway, back to my cookies baking spree. In one and half day, I baked four types of cookies - Peanut Cookies, Pineapple Tarts, Chocolate Chips Cookies and Rose Cookies.

Pineapple tarts were baked using a friend's recipe, which is not convenient for me to share the recipe. However, I do find that there are a lot of very good recipes which anyone can use. Like A Baker's Videoblog, The Little Teochew and from Kitchen Capers Forum and many more! The reason why I still stick to my current recipe is because it only has three ingredients and is able to create the melt-in-the-mouth taste. Also, I knew that many people who made pineapple tarts swear by their SCS salted butter, and so do I. I only use SCS salted butter for making pineapple tart pastry, if not, it won't be found in my chiller!
In order to expedite my baking process, I usually roll up the pineapple paste first and keep them in the fridge. I also made the pastry the day before and stored them in the fridge. So that when I'm ready to bake, I can just take them out from the fridge, mould them and baked. It really saved me a lot of time by doing so. The enclosed pineapple tarts which I made, consist of very little pineapple paste, and lots of pastry, just the way myself and my family members like it!

It was the first time I tried Peanut cookies. This was using Wendy's recipe. However, after mixing, my dough was very unmanageable. Therefore, it was very very difficult to mould. It took me more than 2 hours to mould and bake them! Gosh! I think it was my mis-calculation of the ingredients since I reduced the quatities. It was supposed to be "melt in the mouth", mine was crispy and crunchy (due to my kneading and kneading). However, the comments given was good too! At least my siblings like the fragrance of the peanut!
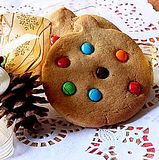
The first time I tried Bakertan's Chocolate chip cookies, I like it very much. I had wanted to try his recipe since then, but I didn't have the time to bake them. So this time, I decided to bake it as part of the CNY cookies. As I didn't want to wait for the dough to harden, I dropped the very very soft and creamy dough onto the tray immediately. There were two batches which I baked. For the first batch, I baked it immediately when the tray was full. For the second batch, I placed the tray into the chiller while waiting for the first batch to be baked.
The conclusion was, the batch which was baked from the chiller spreaded less. Nevertheless, they are equally good. My siblings loved this chocolate chip cookies. They said it tasted exactly like Famous Amos cookies sans the aroma! They were snacking on this cookies non-stop! I was glad they loved it too!
Finally, the very last cookies I baked was the Rose Cookies from Gina's blog. I recalled trying some rose cookies last year, which was really nice with melt-in-the-mouth texture. However, I knew this recipe wouldn't have that kind of texture. Since I still have my Rose Water and some roses, I decided to try this cookies.
I didn't follow the instructions completely. Instead of melting the butter, I creamed the butter with sugar instead. The dough was really easy to handle. I was able to mould it round nicely. Even though SRF was used, the shape didn't change much. It only become firmer after baking, with very little increase in size. The cookies were really fragrant, crispy and crunchy!
After trying out so many different cookie recipes, I had a feel of the various dough texture. Even though the texture were different, they all churned out fragrant crispy and crunchy cookies. Somehow, I enjoyed baking these cookies after I received positive feedback from my family.
Recipe for Rose Cookies, with slight modification from Taste of Time.
(Makes about 170 one-inch cookies)

Ingredients
250g Salted butter, room temp

400g Self Raising Flour, sift
150g Icing sugar, sift
4 tsp Rose water (I used 5 tsp, which I think can be reduced to 4)
10g Dried mini rose buds
Method
1. Remove leaves, stalks from rose buds, peel and separate rose petals.
2. Cream butter and sugar until light and fluffy.

3. Add rose water, mix well.
4. Add in flour, followed by rose petals and mix till it forms a smooth dough.
5. Mould the dough into rounds place on a baking tray.

6. Bake in preheated oven 180C for 15 mins.
7. Remove to cool before storing.

I'm submitting this Rose Cookies to the Aspiring Bakers #3: My Favorite CNY Cookie (Jan 2011) hosted by Jess.

Black is in, Gold is in, and so is Black & Gold

I recalled trying black open-faced pineapple tarts last year from a renowned bakery. Having that experience in mind, I decided to give this a try-adding bamboo charcoal into the pastry for pineapple tarts!

As it turns out, in terms of looks, it was (exotically) pretty. In terms of taste, well, the charcoal actually masked the very buttery taste of the pastry, even though the charcoal taste was also not that prominent. I actually overbaked the first batch, which was crispy rather than melt-in-the-mouth. The second batch was just perfect! (Such things usually happens when it's the once-a-year bake!)
I added about 5g of bamboo charcoal to the flour. After moulding the dough, I brushed gold dust mixed with milk on it. My conclusion was, addition of the milk is not necessary. The gold dust sort of "sank" to the bottom, so for each stroke I applied, I'll have to mix them again.

I'll leave it to you to appreciate the new beauty - Black & Gold Pineapple Tarts.

Pound Cakes Revisited

I cannot resist pound cakes when I see one, especially those beautifully baked pounds. Even though I have my own foolproof pound recipes, I'm always tempted to try new recipes.

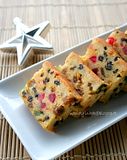
When I saw NEL with her Fruit & Nut Pound Cake, I cannot resist it. So I baked one loaf. It was exactly like what she described - moist, but not heavy, buttery but not overpowering!
As if baking one wasn't enough. Two days later, I used the same recipe and baked a Chocolate Chip Pound Cake for breakfast. This time, I think I overbaked it slightly as I was using a smaller loaf pan. Even so, the taste was also very good. I replaced 15g cake flour with cocoa powder and added 120g chocolate chips but omitted the fruits and nuts. Do try this recipe if you have craving for some pound cakes (just like me!)

Chocolate Oblivion Truffle Torte

It was the big FOUR for my elder sister. She celebrated her birthday on the first Sunday of the new year. We helped with some of the planning. It was my honour to bake a birthday cake for her celebration. We discussed about the cake which she would like to have. Finally, we confirmed on dark chocolate truffle torte as she is a chocolate fanatic, but dislikes normal flour cakes!
Since she was inviting friends and family members, she needed a cake that is enough to feed about 30 persons. I proposed to make a 2-tier cake for her and she was agreeable. The largest cake that could fit into my oven was 10". So I made a 10" and 8" round cakes for her, and topped them with lots of strawberries and blueberries.
At her request to have one more dessert for her catering food, I decided to make mini Nutella Cupcakes and have them displayed in my 3-tier trays. I also made a mini-tag for it. Some of her friends actually thought that the cupcakes came with the caterer! *grin*
 
Back to the dark, rich chocolate torte. I've made this torte before and I really like it. It is very smooth. It's like the cake version of nama chocolates. You can find the original recipe from Rose Levy here, and a recipe with slight modification from Taste Goblet Blog. The original recipe makes a 8", approx. 1.5" high cake. Actually, a 10" cake is enough to serve about 20-25 persons as the cake is really rich.
For the 10" cake, I doubled the recipe, and made a 2" high cake. This is how I made it.

Recipe for 10" Chocolate Oblivion Truffle Torte, adapted from "The Cake Bible"

Ingredients:
908g 70% Chocolates, chopped coarsely (You can use any bittersweet chocolates, like Valrhona, Aalst etc)
454g Unsalted butter
12 Large eggs, (600g withou shells)

Method:
1. Preheat oven to 200C. Prepare a 10" springform pan, buttered, and bottom lined with buttered parchment or wax paper; outside of pan wrapped with a double layer of heavy-duty foil. A bigger pan to serve as a water bath.
2. Melt chocolates and butter in a large bowl in a microwave. Check and stir every 5secs. Do not over heat the chocolates. Stir until smooth. Leave aside.
3. Whisk the eggs in another large bowl over double boiler until warm to touch.
4. Remove from heat and continue beating until the mixture triples in volume and holds soft peaks.
5. Fold half of the eggs into the chocolate mixture until it is almost incorporated. It is important that you fold the EGGS into the chocolate and not the other way because this keeps the torte light.
6 Fold the remaining half of the eggs into the chocolate-egg mixture until it is just blended and no streaks remain. Use a rubber spatula to finish folding, scraping up the mixture from the bottom to ensure that all the heavier chocolate mixture gets incorporated.
7. Pour the batter into the 10" pan and place in a hot water bath.
8. Bake for 8 mins. Then cover the top of the cake loosely with a large piece of foil and bake another 16 mins. The cake will look barely done, with centre wobbly, but it’s supposed to be that way.
9. Remove cake from oven and from the water bath and leave to cool for an hour in the pan, on a wire rack. Cover tightly and chill overnight.
10. To remove cake from tin, use a torch, hair drier, or a hot damp towel to wipe the sides of the pan. (I used a blow torch.)
11. Run a thin metal spatula around the sides of the torte and release the sides of the springform pan. Place the plastic-wrapped plate on top and invert the torte onto it. Peel off greaseproof paper at the bottom of the torte. Turn it over again onto a serving plate/board.
12.  Decorate as desired. Or topped it with whipping cream before serving. Enjoy!
Note:
~ Bring the cake out of the fridge about half an hour before serving. When it is softer, you will be able to experience the smooth texture that melts in your mouth.
~ Best served with strawberries or raspberries to complement the dark chocolates.
~ You may add 3 tbsp of sugar if you prefer a sweeter torte. Add it to the eggs when you are beating it.

Aspiring Bakers #2: Christmas! (Dec 2010) Roundup

Started with Small Small Baker in Nov 2010, I was honoured to be hosting this for Dec 2010. The response was very encouraging, which made the host very busy! Hahaha...It was also my pleasure to know so many talented bakers through hosting this event! Thank you very much to all of you who has supported the theme for December.

Here are all the wonderful bakes submitted for this month's theme - Christmas! listed in the order of the date of submission.

1. Vanilla Cupcakes by Nancy of Bake for a Queen
Photobucket
2. Stollen by Esther of 我的厨房乐园
Photobucket
3. Christmas Tree Custard Bread (Super Soft) 圣诞树卡士达面包 (超软) by Angel of  Cook.Bake.Love
Photobucket
4. Polvorones (A Spanish Cookies) by Anncoo of Anncoo Journal
Photobucket
5. Stollen by Cheah of No-Frills Recipes
Photobucket
6. Bolo De Coco (Coconut Cake) by Peng of Peng's Kitchen
Photobucket
7. Gingerbread Man by Ellena of Cuisine Paradise
Photobucket
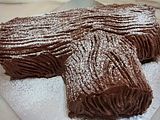
8. Chocolate Log Cake by Bakertan of Baking Library
Photobucket
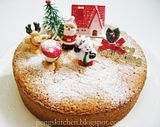
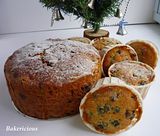
9. Fruit Cake by Missy of Sweet Crumbs
Photobucket
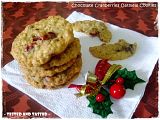
10. Chocolate Cranberries Oatmeal Cookies by DG of Tested and Tasted
Photobucket
11. chocolate cranberry cream yule log by Zoe of Bake for Happy kids
Photobucket
12. Almond Crisps by Ah Tze of Awayofmind
Photobucket
13. White Xmas logcake by Cathy of Cathy's Joy
Photobucket
14. Belgium Speculas by Quay Po of Quay Po Cooks
Photobucket
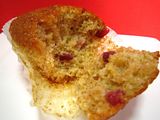
15. Christmas Muffins - Orange & Cranberry by Jean of Needmorenoms
Photobucket
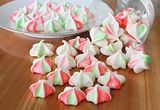
16. Festive Meringue Kisses by Gertrude of My Kitchen Snippets
Photobucket
17. Christmas Candy Cane Cookies by Anncoo of Anncoo Journal
Photobucket
18. Christmas Macarons by Alison of Sweets & Loves
Photobucket
19. X'mas Honey Cookies by Wang Li Ying of Happy Flour
Photobucket
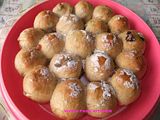
20. Mini Mixed Fruits Buns by Vivian of Vivian Pang Kitchen
Photobucket
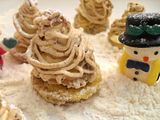
21. Mont Blanc-cream of chestnut on almond tart by Lena of Frozen Wings
Photobucket
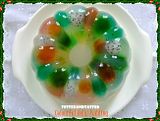
21. Colourful Jelly Pudding by DG of Tested and Tasted
Photobucket
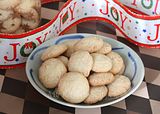
22. Coconut Cookies by Gertrude of My Kitchen Snippets
Photobucket
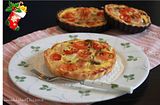
23. Mushroom, Tomato & Camembert Tarts by Wendy of Wen's Delight
Photobucket
24. Oreo Yule log cake by HoneyBeeSweets of HoneyBeeSweets
Photobucket
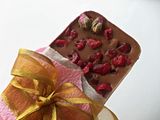
25. My Bar of Chocolate by Lena of Frozen Wings
Photobucket
26. Super Moist Chocolate Cake by Jess of j3ss kitch3n
Photobucket
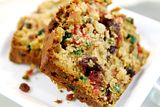
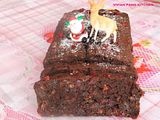
27. Chocolate Banana Fruits Cake by Vivian of Vivian Pang Kitchen
Photobucket
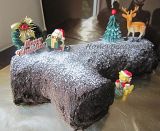
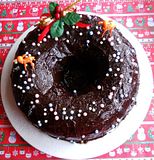
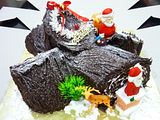
28. Chocolate Logcake by Jane of Passionate About Baking (That's me!)
Photobucket
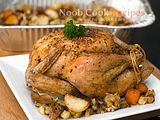
29. Garlic Roast Chicken with Stuffing by Wiffy of Noob Cook
Photobucket
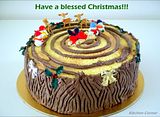
30. Christmas Log Cake by Grace of Kitchen Corner
Photobucket
31. Sugar Cookies by Gertrude of My Kitchen Snippets
 Photobucket
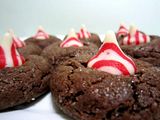
32. Peppermint Mocha Blossoms by Jean of Needmorenoms
Photobucket
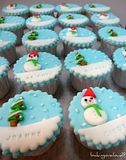
33. Xmas cupcakes by quzzine of baking on cloud 9
Photobucket
34. Cranberry Honey Cupcakes by Peng of Peng's Kitchen
Photobucket
35. My Tiramisu Jingle by Wendy of Wen's Delight
Photobucket
36.
Grand Marnier Butter Cookies by Jess of  j3ss kitch3n
Photobucket
37. Cranberry Pecan Biscotti by Sotong of Cooking it my way!
Photobucket
38. Checkerboard Cookies by Spear of My Baking Milestone
Photobucket
39. Christmas Light Fruit Cake by Jess of Bakericious
Photobucket
40.
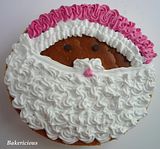
Santa Claus Boston Cheesecake by Jess of Bakericious
Photobucket
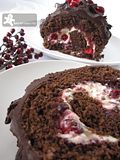
41. Chocolate Swiss Roll with Whipped Cream Filling and Dark Chocolate Ganache by Janine of Not the Kitchen Sink!
Photobucket
42. Christmas log cake by mingfang of cherry-potato
Photobucket
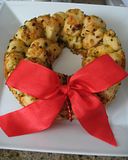
43. Chubble Wreath by kk of My Food Affair
Photobucket
44. Cranberry Shortbreads by Aimei of My Baking Cottage
Photobucket
45. Stone Fruit Tea Cake by Vivian of Vivian Pang Kitchen
Photobucket
46. Roasted Chicken with Brown Rice & Chestnut Stuffing by Ellena of Cuisine Paradise
Photobucket
47. Concorde Dessert by Jane of Passionate About Baking
Photobucket
48. Grand Marnier Orange Fruit Cake by Wendyywy of Table for 2..... or More
Photobucket
Also submitting two entries from Joceline Ng.
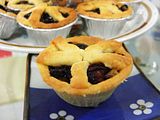
49. Mince Tarts
Adapted from "In the Mood for Pastries & Tarts" by Alan Ooi
Photobucket
(A)
1 portion of sweet short crust pastry

(B)
1 green apple (diced)
100g dried currants
100g sultanas
100g fresh raisins
100g dried apricots (substituted with diced dried pineapples)
100g orange peels (substituted with mixed peels)
80g butter (melted)
90g brown sugar
1/4 teaspoon salt
50ml brandy or rum
2 tablespoon lemon juice
1 teaspoon lemon zest
1/2 teaspoon mixed spices

Method:
1. Mix all the fillings (B).
2. Pastry: Roll the pastry into 3mm thickness. Press into tart moulds. Pour in the fillings.
3. Cover with another piece of pastry. Egg wash and sprinkle with some sugar.
(I did the star-shaped covering on top of each tart instead, and did not sprinkle sugar)
4. Bake in a preheated oven at 180 Degree Celsius for 25 to 30 minutes or until golden brown.

For the sweet short crust pastry:

Ingredients:
(A)
200g plain flour
20g milk powder
110g butter (I used 100g)
50g icing sugar
1/4 teaspoon salt

(B)
2 1/2 tablespoon water

Method:
1. Mix all Ingredients (A) until crumbly. Add in ingredients (B) and mix to form dough.
2. Shape into a ball and press it flat. Wrap it up and chill in the refrigerator for 30 minutes.

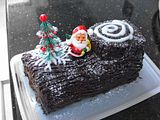
50. Chocolate Peanut Butter Yule Log Cake
Photobucket
Chocolate Roll Cake

Ingredients:
(A)
40g egg yolk
35g caster sugar
60g milk
1/4 tsp salt
40g melted butter
1/4 tsp vanilla essence
20g cocoa powder
55g self rising flour

(B)
80g egg white
1/4 tsp cream of tartar
35g caster sugar

Method:
1. Preheat the oven to 180 degree celsius.
2. Use a whisk to mix egg yolk, caster sugar & fine salt to form a thick batter. Pour in the milk and mix well. Pour in the corn oil and vanilla essence. Blend them together thoroughly.
3. Lastly, sift the self-rising flour into the batter and stir slowly to form a thick batter.
4. In another clean mixing bowl, whisk egg white and cream of tartar at high speed, until fluffy and add in caster sugar. Whisk until a stiff peak meringue is formed.
5. Mix one-third of meringue into the egg yolk batter, using a spatula. Carefully mix in the remaining meringue, taking care not to deflate the egg whites.
6. Pour the cake batter into a 7" X 10" lined swiss roll tray.
7. Bake in the pre-heated oven at 180c for 15 minutes, taking care not to overbake.
8. When the cake is baked, remove from tray and place on a clean tea towel.
9. Roll the cake up with the tea towel while it is still hot. Allow it to rest and cool.
10. Upon cooling, unroll the cake gently.
11. Spread the peanut butter cream filling on the cake.
12. Roll up gently using the parchment paper and leave the paper there to hold the cake in place.
13. Refrigerate the cake while preparing the chocolate ganache.

Peanut Butter Filling

Ingredients
Sufficient peanut butter (suit to taste)
30ml whipping cream

Method:
1. Whipped the cream until stiff.
2. Mix in the peanut butter until smooth and thick.
3. Spread the filling onto the roll cake when the cake is ready.

Chocolate Ganache
60ml low-fat fresh milk
60ml non-dairy whipping cream
125g dark chocolate

Method:
1. Chopped the dark chocolate into small cubes and set them in a saucepan.
2. Pour the milk and cream into the same saucepan, over the chocolate.
3. Cook over low heat, stirring continuously until all the chocolate melts.
4. Continue to cook and allow the mixture to thicken slightly.
5. Remove from heat and set aside for 15minutes. It will thicken on its own.

Assembling the cake:
1. Cut off one end of the roll cake and place it on top of the roll to form a "stump".
2. Frost the cake with the chocolate ganache.
3. Refrigerate the cake for at least 15 minutes to allow the ganache to set.
4. Using a fork, carve out the bark patterns all along the yule log cake.
5. Smooth the stump ends.
6. Using icing, decorate the stump ends with simple swirls.
7. Decorate the cake as desired, with sifted icing sugar and christmas decorations.
8. Chill the cake and serve when ready.
~~~~~~~~~~~~~~~~~~~~~~~~~~~~~~~~~~~~~~~~~~~~~~~~~~~~~~~~~~~~
Up next, Aspiring Bakers #3: My Favourite CNY Cookies (Jan 2011)

This month's event will be hosted by Jess of j3ss kitch3n.
Details of the event can be found here.

Lastly, some reminders to those who want to submit your bakes.

1. Please submit your entry according to the theme of the month. For example, if it is January 2011's theme, then only those blog posts in January 2011 are accepted.

2. You must mention in your post that you are submitting to "Aspiring Bakers" and provide a link to the blog of the host of the month, or else the entry will not be accepted.

3. Please send an email to the host to submit your entry. Just putting a link in your posts is not enough. If you submit more than 1 entry, you have to send email for each and every entry. This is to ensure that the host will receive your entry.

4. Please attach 1 photo only for each entry. Each photo cannot exceed 500KB.

5. Please put "Aspiring Bakers" as your email subject, just in case they land in the spam folder and got accidentally deleted.

6. Please be reminded to provide recipe, or a link to recipe in your post of submission. Write ups without the formers cannot be accepted.

Finally, happy new baking year!