Steamed Chocolate Mantous... again!

After my last attempt on the mantous (buns), I know I can't get enough of these! So after baking the chocolate sables, I decided to make more mantous! Partly also I wanted to make some to give away. The original recipe is from Honey Bee Sweets. She made an assortment, whereas, I stick to chocolate swirl again because my children don't really fancy mantous with fillings.

Here is sharing how I made the pure chocolate swirl buns. I'm reproducing this recipe for my own reference.

Recipe for Steamed Chocolate Swirl Buns, extracted from HBS.

Ingredients:

Starter dough:
120g Hong Kong flour
1/2 tsp Instant dry yeast
70g Warm water
A pinch of salt

Method:
  1. Mix the warm water with the yeast. Mix well.
  2. Then add in HK flour and salt.
  3. Knead all the ingredients together till it forms a soft, smooth dough.
  4. Chill in the fridge overnight. Can store up to 5 days in the fridge.
Main Dough:

(A)
All of the above starter dough, approximately 190g
1 1/2 tsp Instant dry yeast
450g Hong Kong flour
260g Whole milk
70g Caster sugar
1/4 tsp Salt
74g Unsalted butter, room temperature

(B)
2 tbsp Cocoa powder

Method:
  1. Place all the (A) ingredients in a large mixing bowl except the butter.
  2. Knead them together until it forms a dough. Then add in the butter and continue to knead for at least 5 mins until it is elastic and smooth.
  3. Remove 1/3 of the dough and place in a bowl. Cover with cling wrap to proof.
  4. For the remaining 2/3 of the dough, add in (B) and mix well to incorporate completely. Then cover with cling wrap to let it proof for 60mins, or until double in size. (I was busy baking my sables that I let it proof for 80mins. 60mins is suffice.)
  5. When it has double in size, punch out the air.
  6. Roll out both the doughs separately into a rectangle.
  7. Then place the plain dough on top of the chocolate dough.
  8. Roll it out like a swiss roll.
  9. Using a scraper, cut out the dough and place them on a cut rectangular piece of baking paper.
  10. Then place them in a wok, cover and let it proof for 40mins.
  11. Without removing the proofed dough from the wok, turn on the heat and steam for 18mins.
  12. For the second batch (if your wok is not big enough to accomodate all, like me), steam for 12mins.
This time, my swirls definitely looked nicer and neater! Eat with some discipline required, because it is addictive! Enjoy!

I'm submitting this to the Aspiring Bakers #7 - Chocolate Delight (May 2011)!

Vienesse Chocolate Sables

Since it was my last day of "rest" yesterday with my daughter after her operation, I decided to make some light chocolate goodies for the children. I recalled a couple of years ago, I did bake some sables. However, I didn't really fancy it, nor crave for it.
I changed my mind about the Vienesse Chocolate Sables when I saw Shirley's post! Her sables looked so pretty and tempting. That really prompted me to try. I decided to bake it today since I have all the ingredients, and I can still manage (as my domestic helper is still around).
The chocolate sables are very chocky and melt in the mouth. It's really very addictive. I used a small star nozzle to pipe out a "W" shape. It turned out pretty nice. This is a must-try for any chocolate lovers!
The recipe can be found in Kokken69 blog.

I'm submitting this to the Aspiring Bakers #7 - Chocolate Delight (May 2011).

Pandan Chiffon Cake

After making the pandan coconut steam cake, I still have pandan juice and coconut cream in the fridge. I decided to bake the most classic cake - Pandan Chiffon! Once a while, I still like to make the most basic bakes - pound cakes and chiffons. It's a good way to practice the basic techniques. I can't believe the last time I baked a pandan chiffon was a year ago!
Anyway, using the same recipe I used last year, I reduce it slightly for my biggest tube pan. Here is reproducing the recipe from ieatishootipost.
Recipe for Pandan Chiffon Cake, modified from ieatishootipost.
(Makes a 23" chiffon)

(A)
4 Egg yolks
55g Caster sugar

(B)
77g Corn oil
94g Coconut milk
1 1/3 tbsp Pandan juice
1tsp Vanilla extract

(C)
133g Top flour (or cake flour)
1 1/3 tsp Baking powder
A pinch of salt

(D)
6 Egg whites
68g Castor sugar
3/4 tsp Cream of tartar

Method:

  1. Cream (A) until light using a hand whisk. Alternatively, you can use an electric mixer to cream till light and fluffy.
  2. Add in (B) gradually. Mix well.
  3. Sift (C) into the mixture and mix well. Leave aside.
  4. In a mixer bowl, beat the egg whites until foamy with a whisk.
  5. Add in the sugar and cream of tartar gradually.
  6. Continue beating until soft peak. Soft peak is when you lift the whisk off the egg whites, the egg whites are able to fall back and form a "C" shape, not a "U" shape. If it is "U" shape, it has not reached soft peak yet.
  7. Using a spatula, add one third of the egg whites into the yolk mixture and fold to ensure that they are mixed thoroughly.
  8. Then pour this mixture back into the egg whites, and very gently fold the batter into the egg whites. Do this gently but swiftly.
  9. Before you pour the mixture into the tin, give your batter tin a few knocks on the table. This will get rid of the big bubbles before you pour into your tube pan.
  10. Pour the batter into your tube pan slowly and in one direction. Do not grease your pan.
  11. Bake it in a pre-heat fan oven of 160C for 50mins.
  12. Once it's ready, overturn the cake on a bottle top and let it cooled completely.
For me, I'm still trying to master my skills in removing chiffons from its pans. You can see my removal skills is completely hopeless!

Steamed Chocolate Swirl Buns

When I saw HBS's post on fluffy and soft buns (mantous), I was sold! My children have been requesting me to buy mantous from the supermarket. So her post was just in time for me to make for my children. My steamed buns were not as pretty as hers, however, nobody is complaining about the look!
True to her comments on the buns, it was really very fluffy and soft. Even when it had cooled, you can still feel the fluffiness of the buns. The chocolate taste was mild. The buns were not very sweet. I think my children will prefer it to be sweeter, and so do I! As the buns were very light, I can have at least three at a go!
Do give this bun a try, it's well worth it! I'll be making some again next week! Maybe I'll make more and store in the freezer, so that when my domestic helper goes back for her home leave, I can just take it out from the freezer and steam!

You may refer to the recipe at HBS's blog.
I'm submitting this to Aspiring Bakers #7 - Chocolate Delight (May 2011).

Steam Pandan Coconut Rice Cakes

This week is totally out of work for me. I had scheduled for an operations for my precious daughter. When she was born, she had lower eyelashes growing inwards. The medical term is called Entropion - is the turning in of the edges of the eyelid (usually the lower eyelid) so that the lashes rub against the eye surface. Long term, it will cause cornea dryness and irritation, which may increase the risk of Cornea abrasionsCornea ulcers and eye infections. One of the treatment is to have surgery to correct the position of the eyelids. A couple of years ago, she was referred to KKH Specialist for her eye condition. The doctor did mention about the operation, as an option, to us though. However, at that time, she was still very very young, we didn't want her to go through the operation.


Then early last year, when she entered primary school, the health check referred her to Refraction Clinic. After the check in Refraction Clinic, she was highly recommended to wear spectacles. When we brought her to an optometrist, he strongly encouraged us to send her for an operation. He told us that her cornea has been very badly scratched, if  such continue, she might go blind in her later years. That scared us! The seriousness of going blind wasn't mentioned to us when we brought her to KKH. And for her condition, the optometrist had to prescribe a transition lens. Her astigmatism was over 300 degrees. He said that under such condition, she will be very sensitive to lights, therefore, it'll be better for her to wear transition lens. A letter from the optometrist had to be given to the school for her to wear transition lens as mandatory, and not for beauty purpose.


Since then, we made appointment to go back to KKH to review her condition and requested for an operation. The date had been scheduled, and finally, she undergone the operation. She was put through the general anesthesia. I hope that after the operations, her eye problem will be a history. I shall spare the details of the operations.


On the 3rd day, the stitches actually came out itself...notice the yellowish "thread"?
Since I was home for the past two days, I decided to steam some cake. After I bought the "Magic Steamed Cake" by Alex Goh, I've not tried any of the recipes. So this is the best opportunity to do some steaming instead of baking. I decided on the steamed rice cake. However, since I still have my pandan leaves and coconut cream, I made Pandan Coconut Rice Cakes. I found that the coconut was a tad too faint. The taste was rather subtle. I will like it to be richer though. I will increase the coconut cream by at least another 50g in future.
Recipe for Steamed Pandan Coconut Rice Cakes, modified from "Magic Steamed Cake".
(Makes approx. 18 regular cupcakes. Mine was of various sizes)


Ingredients:
195g Rice flour
80g Plain flour
50g Pandan juice
80g Coconut cream
200g Water
30g Brown sugar
80g Fine sugar
3 tsps Baking powder


Method:
  1. Mix all the ingredients together. Mix well till no lumps.
  2. Pour into the cupcake mould till about 90% filled. You may lined the cupcake moulds. For me, I brushed the moulds with oil.
  3. Steamed on medium high for about 23mins.
The day before my daughter's operation, it was a public holiday. In order to avoid crowded places before her ops, we spent a lazy day at home. I made dinner for my family. The dinner include tomato rice wrapped in omelette, grilled cheesy dory fish and spicy fries. Besides the store-bought spicy fries, the rest were specially cooked by me. Though there were quite a fair bit of work, the healthy combination was truly worth the effort!

Chocolate Peanut Butter Tarts

I finally found time to do some baking this week. Past few days I was coaching my children for their SA2 (mid-year exams). I'm relieved exams are over already. Like what Happy Home Baking said, with school-going children, we can't even enjoy the Labour Day and Polling Day holidays!

The other day, Cathy asked if I submitted any entries for the Aspiring Bakers for April. I told her I didn't manage to because for that month, my cheese bakes didn't turn out well! So I decided not to embarrass myself by submitting something that didn't work for me. She has submitted quite a few entries for the theme this month, and encouraged me to do so too! So I thought it's time to catch up with this event. I figured the simplest theme should be chocolate already!

So here I am, fulfilling my own challenge. I have decided to make Chocolate Peanut Butter Tarts. I got the idea from Crustabakes. She makes really yummy desserts! Just by looking at the desserts make one drool! I modified her recipe and used my own tart recipe. My children loves the tartlets so much they just pop one after another into their mouth until I had to stop them in case they got overdosed! This is really worth a try!

I'm submitted this to Aspiring Bakers #7 – Chocolate Delight (May 2011).

Recipe for Chocolate Peanut Butter Tart, modified from Crustabakes.
(Makes a 9" tart. As I have spare tart dough, I made extra mini tartlets)

Sweet Cookie Tart Crust

Ingredients:
113g Unsalted butter, cubed
30g Caster sugar
200g Plain flour
1/8tsp Salt
19g Egg yolk
28g Heavy cream

Method:

  1. In a medium bowl, stir together the flour, sugar and salt.
  2. With a scraper, cut in the cold butter until the mixture resembles coarse meal.
  3. In a separate small bowl, stir together the yolk and cream.
  4. Mix it into the flour mixture until the dough comes together and can be formed into a ball.
  5. Flatten it into a disc, wrap the dough and refrigerate for at least 30mins until firm enough.
  6. Roll it out and transfer the dough into a pie pan.
  7. Bake at 200C for 20 mins, or until light brown.
Chocolate Ganache

Ingredients:
100g Semi sweet chocolate, chopped (I use 72% Valrhona chocolate mixed with bittersweet chocolate)
80g Whipping cream


Method:

  1. Place the chopped chocolates in a heat-proof bowl.
  2. In a saucepan, heat up the whipping cream. Before it boils, turn off the heat and pour into the chocolate.
  3. Let it rest for 1 minute before mixing them together.
  4. Ensure that all chocolates are thoroughly melted and mixed.
  5. Leave aside to cool.
Peanut Butter Mousse

Ingredients:
65g Cream cheese
170g Creamy peanut butter
20g Fine sugar
180g Whipping cream

Method:

  1. Lightly whipped the whipping cream. Leave aside
  2. In a mixing bowl, beat the cream cheese, peanut butter and sugar until thoroughly mix.
  3. Beat in 1/4 of the whipped cream into the peanut butter mixture. Mix till just incorporate.
  4. Fold in the rest of the whipped cream until they mixture is well blended, but still airy.
  5. Scrape the mousse into the tart crust and smooth the surface so that it is level.
  6. Pour the chocolate ganache over the peanut butter mousse slowly. Thickness depends on individual preference.
  7. Take care not to pour too much on a single spot as it might cause a depression in the mousse.
  8. Using a spatula, gently spread it across the tart and even out.
  9. Refrigerate until ready to eat.

“Ladies’ Nite” 女人聚乐部 Cooking Workshop

For a couple of nights last week, I caught a glimpse of the advertisement on Channel U regarding about a Cooking Workshop for the talk-show “Ladies Nite”. I managed to send in my email just before the closing date. Immediately after I sent in, then I realised it’ll be held on 7 May, Polling Day! I wasn’t concerned about the Polling Day, but more like taking that Saturday to do revision with my children for their coming exams. Nevertheless, I thought to myself, I might not be selected anyway. So I stopped worrying, even though I was secretly hoping to be selected!
One day after the closing date, I received an email informing me that I’ve been selected to cover the Cooking Workshop! I was also allowed to bring three friends along! I was both elated and worried. I was worried if my spouse will let me go since this weekend is critical for revision. However, my worries were unfounded. In fact, I managed to persuade him to go with me too! I gave the excuse that it'll be a great Mother's Day present for me too!

One of the catch to attend the workshop for me is also the host, Michelle Chong. My children love to see her in “The Noose”. They are a great fan of her, and so are we! For me, it’s both the cooking workshop and meeting the hosts that I’m looking forward to!

On the day itself, we drove to the Polling Centre to cast our votes before going to pick up my niece. I have invited my niece and my sister to tag along. When we reached Cookyn, Inc., it was still early, but all the tables, except one, were already filled with participants. Gradually, more participants streamed in. The owner, Mervyn, was busy with some preparations.

After 2pm, Vivian and Michelle appeared.  Both of them looked as good as in the show! In fact, they looked more natural and gorgeous in real person! They were very spontaneous. They started chatting with the participants, and asking us about our views of “Ladies’ Nite”. We started warming up. After a few more chats, they started the demonstration proper.
Michelle started her preparation for the “Steam-baked Fish Roll”. It included frying onions and mushrooms. Then wrap dory fish with ham and cabbage, and placed it on a baking tray.  After that, she added some seasoning and water, and placed them in the oven to bake. There were several parts to her demonstration. After each part, we proceeded to do it on our own. When our fish were baking, Vivian started her demonstration.
Michelle was wearing a mask because she wasn't feeling well that day.
Gorgeous Michelle with her food.
Vivian’s food recommendation was “Cold Rice Salad with Prawns”. Using overnight rice, it was mixed with french beans, tomatoes, corn and prawns. It was seasoned with olive oil, pepper, salt and orange juice! After mixing, it’s best kept in the chiller before consumption.
Pretty Vivian with her food.
After we finished with the preparation for salad, we continued with the final garnishing of the fish roll. Thereafter, we were left on our own to do our final decoration and presentation.
Finally, Michelle and Vivian went around the four tables to judge for the best food presentation.
The winning team had been awarded with a tee designed by Fann Wong. It went to a group of youngsters.
After the prize presentation and photo-taking, we were invited to a simple hi-tea. It was time to eat and enjoy! There were baked macaroni with cheese and sesame waffle cones with caramelised apples. These were in addition to the fish rolls and salad that we made. Among them, I like the fish rolls most. It was really healthy, and simple to make.
It didn't just end here. After filling our tummy, the casts went table to table to get feedback and comments on the workshop and the show. They interviewed everyone of us, followed by photo-taking. I understood that this workshop will not be telecast on the television.
The workshop ended with a "Questions and Answers" session where more goodies were given out. I was lucky to be able to answer a question and got myself a Channel U goodie bag!
I left the workshop feeling filled, happy and star-studded! It was a pleasure interacting with Michelle, Vivian, and the team from Channel U. Thank you Channel U, for giving me this opportunity to cook with the hosts, and my family members. I’ll be tuning in to “Ladies’ Nite” every Tuesday from 8-9.30pm, to learn more tips on trends, wellness and cooking!
Cooking workshop sponsored by Channel U Ladies' Nite.


Read more about this workshop on Channel U's blog:
http://blogs.xin.sg/ufunbites/2011/05/11/ladies-nite-cooking-up-a-storm/
http://blogs.xin.sg/ufunbites/2011/05/12/ladies-nite-cooking-up-a-storm-part-2/
http://blogs.xin.sg/ufunbites/2011/05/13/ladies-nite-cooking-up-a-storm-part-3/
http://blogs.xin.sg/ufunbites/2011/05/16/from-the-bloggers-view-ladies-nite-cooking-workshop/

Royal Tea Rose Butter Cakes

Last Sunday, I bugged my spouse to send me to ToTT for it's Mother's Day Sale. Unfortunately, he refused, thinking that I might stay there for a long time. So he suggested I drove there myself. Even though I was disappointed, I proceeded as suggested by him. I even brought my daughter along. The boys need to stay home to revise their work for the coming SA1.

I happily bought a cast aluminium sweetheart rose cake pan. I found such pans to be expensive. However, I decided I wanted to pampered myself with this pan this Mother's Day. So without hesitation, I took one. I also bought other items from ToTT. The joy is in the buying, not exactly the items sometimes! LOL.
I also brought my daughter to the Bistro for lunch. The kid's meal of fish and chips was pretty good. Both of us loved the mushroom soup. There were bits of fresh buttons mushrooms in them. Yummy.
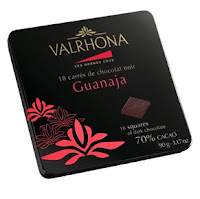
After our lunch, I went to one of the shop and bought a small tin box of Valrhona Guanaja 70% Cacao for my sister as Mother's Day gift. It was costly for a small tin box like this. However, the tin packing made it worthwhile.
Since Mother's Day is just round the corner, I decided to use my rose aluminium pan to bake for my friends. Initially I wanted to do a marble cake, but thought that it was quite ordinary since my friends have already tried it. Finally, I decided to use the Royal Tea paste I bought from Kitchen Capers a week ago.
 Recipe for Royal Tea Butter Cake, modified from Ju's Marble Cake. (My all time favourite butter cake)
(Makes 12 roses, and a small rectangular loaf)

Ingredients:
225g Unsalted butter, softened
160g Caster sugar
4 Eggs
225g Self-raising flour
3 tbsp Whole milk
2 tsp Royal Tea paste

Method:

  1. Beat the butter and sugar together, then add the eggs one at a time, mixing well after each addition.
  2. Fold in the flour, milk and paste until the mixture is smooth.
  3. Scoop the batter into the rose moulds.
  4. Bake the cake at 180C for 25 mins or until a skewer inserted into the centre comes out clean.
  5. Turn out onto a cooling rack and leave to cool.
This recipe might not totally be right for the rose mould as it rises after baking. I believe recipes that do not rise much should be used, otherwise, the rose might not be able to "stand" upright when it's overturned.
Anyhow, the rose cakes turned out rather nice and the patterns were rather distinct. It was a good investment. The royal tea cake taste nice, with a hint of tea. It's very special. Not overwhelming, light and mild.

Here's wishing all great mothers, a